Implementing Server-Side Ad Insertion in NextGen Live (SSAI)
Introduction
NextGen Live supports Server-Side Ad Insertion (SSAI), where ads are stitched into the live video stream on the server side. This delivers several advantages over client-side ads:
- Ad blocker resistance: ads are part of the live stream, so client-side ad blockers do not affect them
- Seamless playback: ads play without buffering or rebuffering at break boundaries
- SCTE-35 support: industry-standard signaling for ad break placement, either from your encoder or triggered manually
- Fill slate support: a fallback video plays if an ad break cannot be filled with creatives
How SSAI fits together
SSAI in NextGen Live spans four independent layers. Each layer is configured in a different surface and persisted differently. Understanding the separation prevents the most common configuration mistakes.
| Layer | Where it is set | What it does | Persistence |
|---|---|---|---|
| 1. Ad configuration | Admin module → NextGen Live Settings | Defines the ad server URL, response type, custom headers, and beacons | Account-wide; reused across channels |
| 2. SSAI enablement | Live module → New Channel wizard (Step 3) | Turns on SSAI for a channel and assigns the fill slate | Set once at channel creation; cannot be toggled later |
| 3. Ad configuration selection | Control Room → Channel URLs or Embed on Web | Picks which ad config the playback token will carry | Baked into the JWT issued at the moment the URL or embed code is generated |
| 4. Ad break trigger | Encoder SCTE-35 signal or Control Room Insert Ad | Tells the live transcoder where ad breaks start and how long they are | Per-event; does not select an ad config |
Layer 1: Create the ad configuration
An ad configuration defines how ads are requested from your ad server. It is created once per account in the Admin module and is reused across every SSAI-enabled channel.
- Open the Admin module in Studio.
- In the left navigation, click NextGen Live Settings.
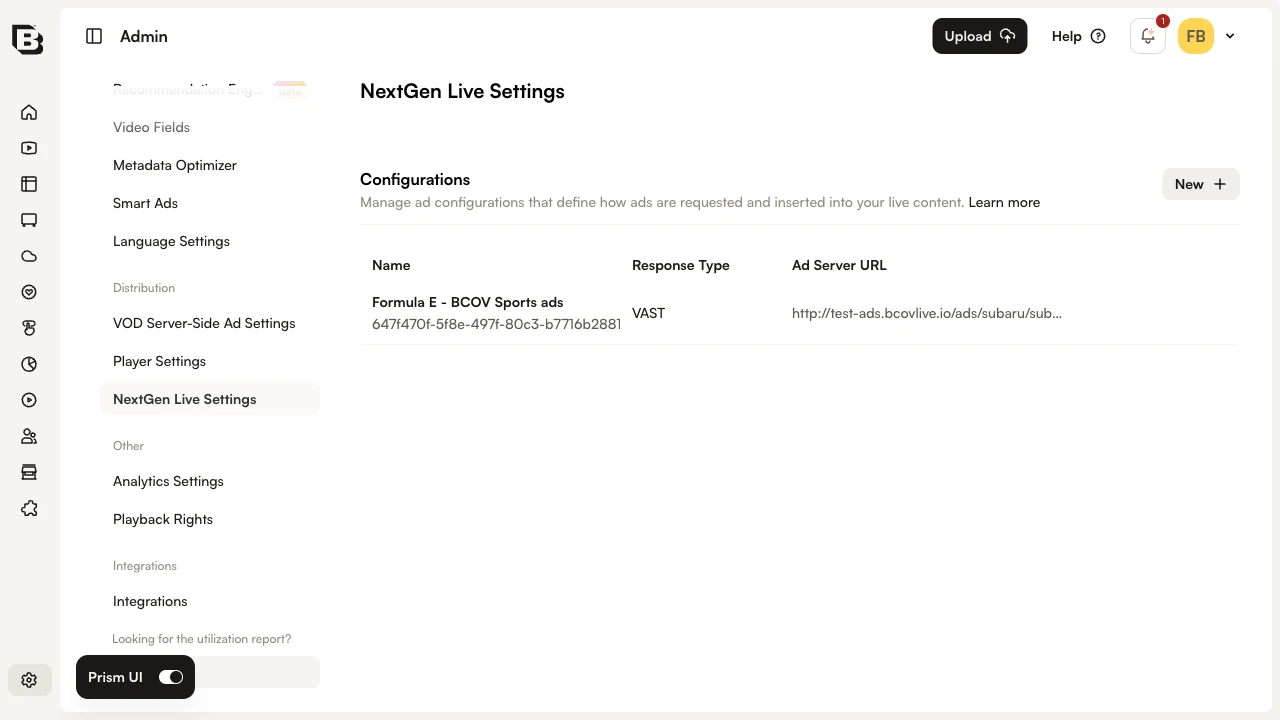
- Click New to open the configuration form.
- Enter a Name for the configuration. This is the label viewers’ ad configs will be selected by in the Control Room.
- Enter the Ad Server URL. The full ad tag URL from your ad server.
- Select the Ad Server Response Type: VAST, VMAP, or DFP.
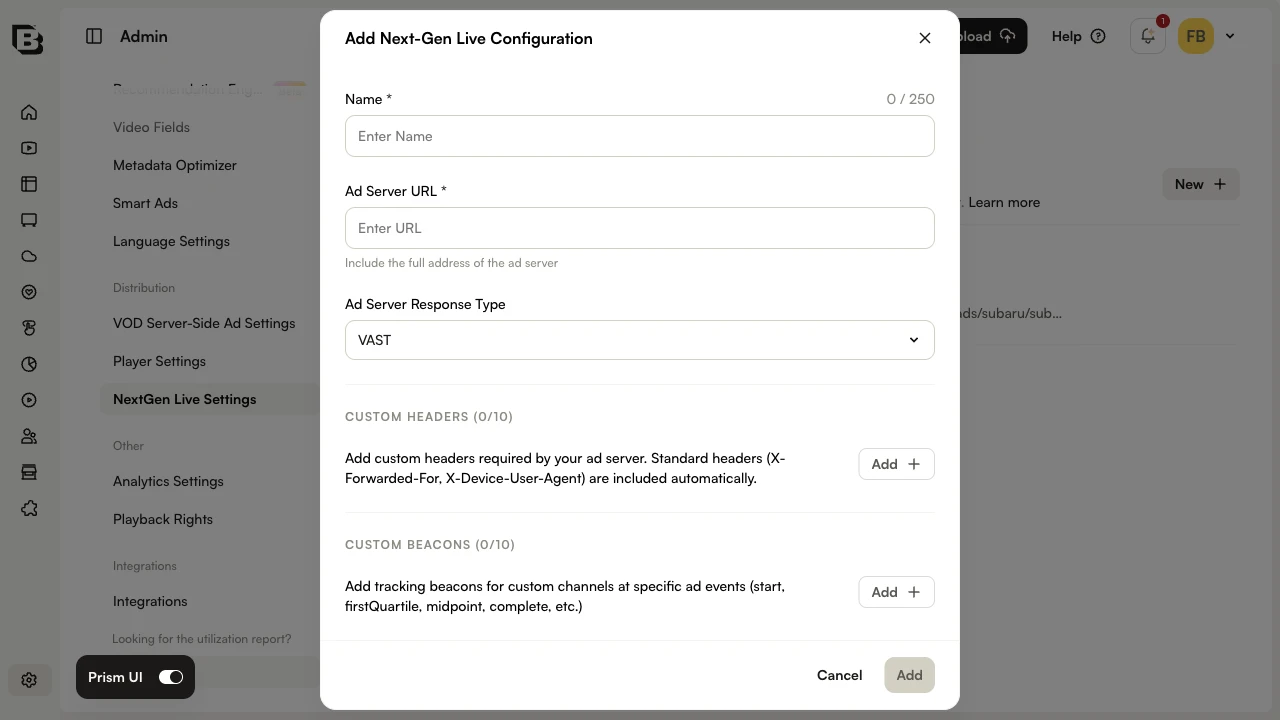
- Optionally, add Custom Headers required by your ad server. Standard headers such as
X-Forwarded-ForandX-Device-User-Agentare sent automatically. - Optionally, add Custom Beacons for tracking on custom channels (start, firstQuartile, midpoint, complete, etc.).
- Click Add to save the configuration.
Layer 2: Enable SSAI on the channel
SSAI is enabled on a channel during channel creation. The same step assigns the channel’s fill slate — a video that plays during ad breaks if no ad is returned.
Prepare a fill slate video
The fill slate must already exist in your Video Cloud account before you create the channel:
- The asset must have at least one MP4 rendition. Use an Ingest Profile that produces MP4 output.
- Resolution should match your live stream output to avoid scaling artifacts.
- Use branded, high-quality content — the slate is what viewers see when no ad is available.
Create the channel with SSAI enabled
- Open the Live module and click New Channel.
- Choose Event Channel or Linear Channel, then click Next.
- Enter a channel name and complete Step 2 input settings.
- On Step 3 (Stream Advanced Settings), expand the SSAI section.
- Toggle Enable SSAI on. A Select Slate Asset control appears.
- Click Select Slate Asset, choose a video from your Video Cloud account, and click Select. Only videos with MP4 renditions are eligible.
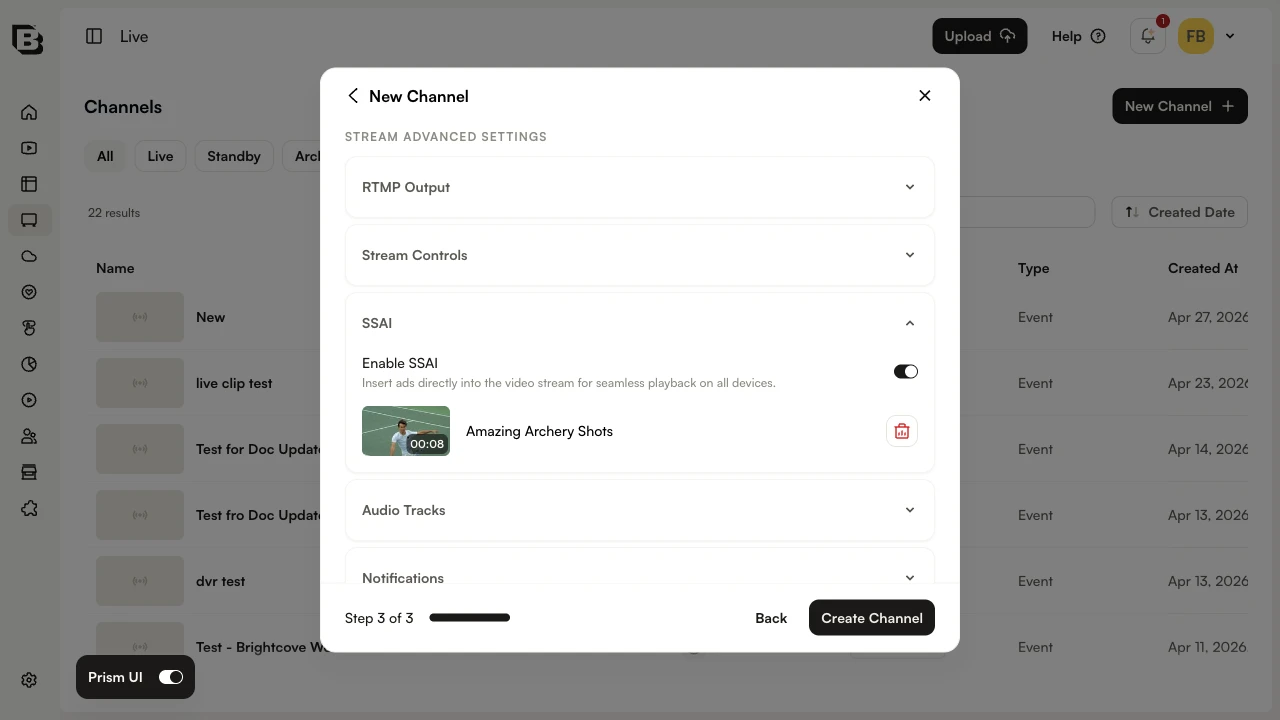
- Click Create Channel.
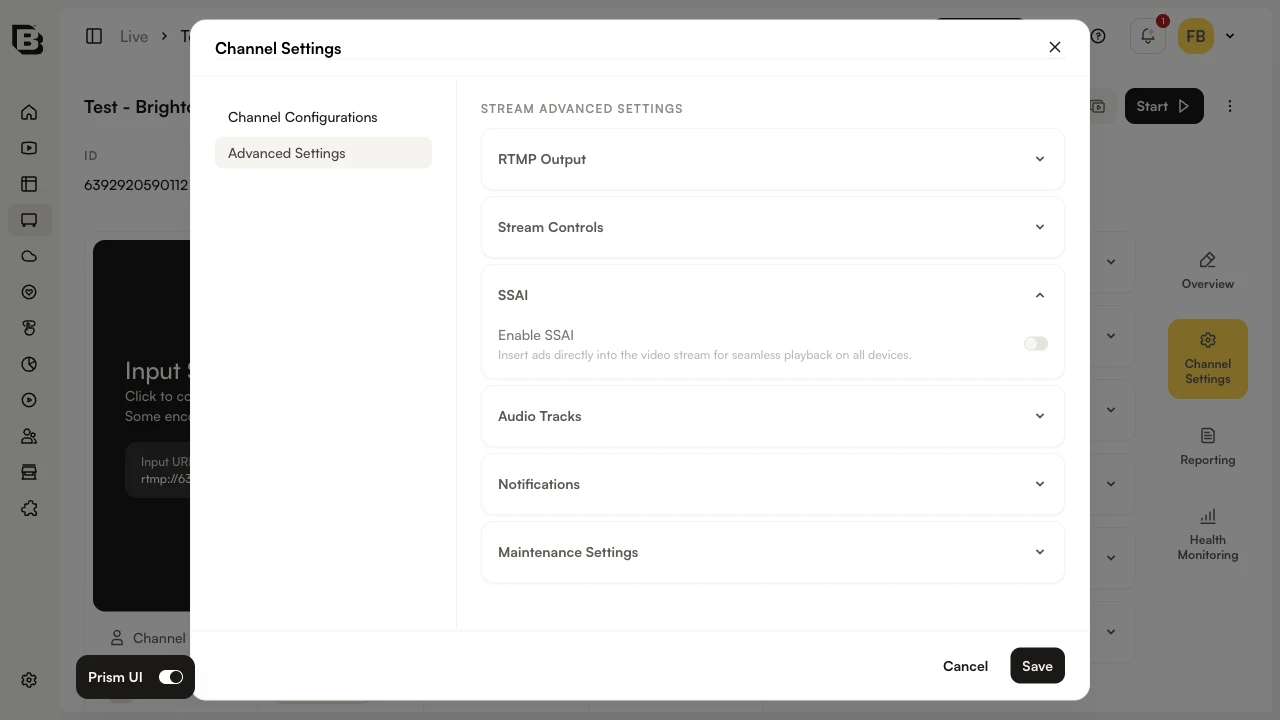
View SSAI status on an existing channel
You can verify SSAI is enabled on a channel under Channel Settings → Advanced Settings → SSAI. The toggle is read-only.
Layer 3: Select an ad configuration at playback time
Enabling SSAI on a channel does not pick which ad configuration runs — that is chosen when a playback token is issued. There are two surfaces for this, and they produce independent tokens.
From the Channel URLs panel
Use this surface for direct integrations — testing the playback URL, pasting it into a custom player, or sharing it with another team.
- Open the channel’s Control Room and expand the Channel URLs panel.
- Click the Ad Configuration dropdown and choose one of the configurations created in Layer 1.
- Copy the regenerated Playback URL. The URL contains a JWT that carries the selected ad configuration ID.
From the Embed on Web modal
Use this surface to publish a Brightcove Player with a specific ad configuration baked in. The generated iframe or JavaScript embed code is what viewers actually load.
- In the Control Room, click Embed on Web.
- Pick a Player from the dropdown.
- Set Player Sizing, Aspect Ratio, and dimensions as needed.
- Click the Ad Configuration dropdown and choose a configuration.
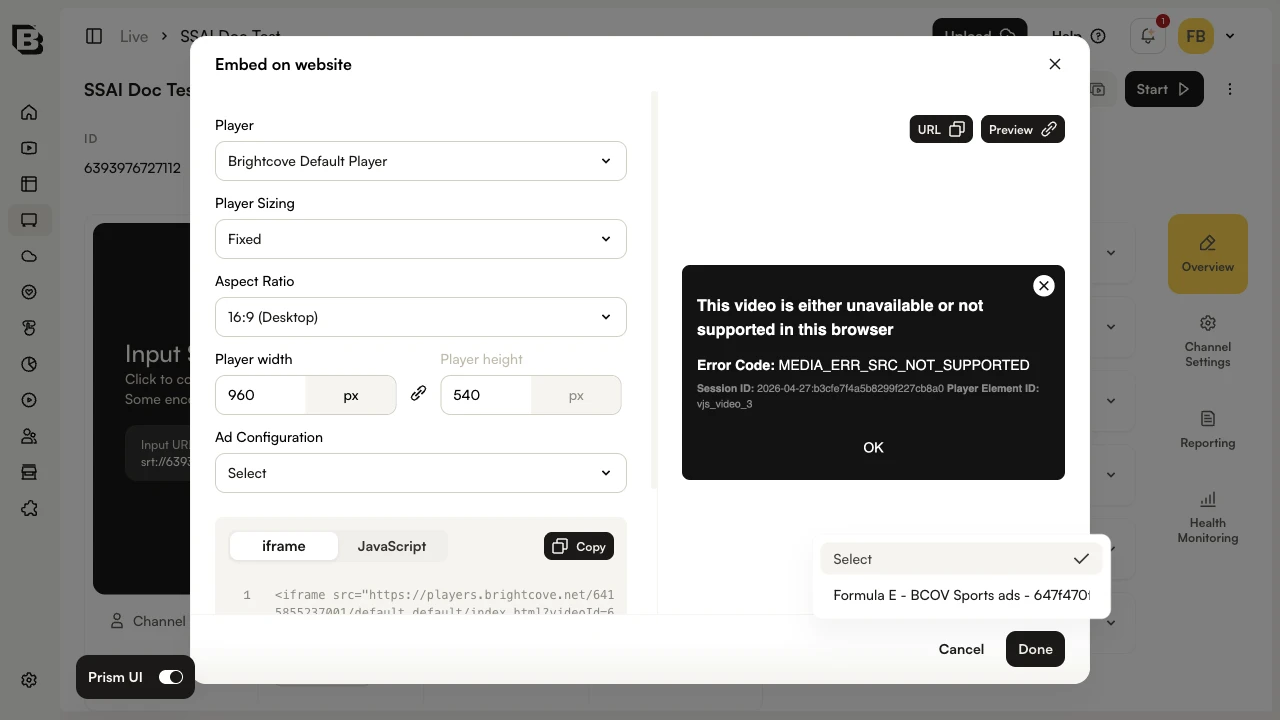
- Copy the iframe or JavaScript embed code from the bottom of the dialog and click Done.
The embed code carries the chosen ad configuration. If you later want viewers on a different ad config, regenerate the embed code with the new selection — previously distributed embeds will continue to use the original.
Layer 4: Trigger ad breaks (SCTE-35)
SCTE-35 cues mark where the live transcoder should open an ad break. They do not pick which ad runs — that decision is made by the ads service using the ad configuration on the viewer’s playback token.
Automated SCTE-35 from the encoder
Most production setups send SCTE-35 cues directly from the encoder, so ad breaks are timed against the source content:
- Confirm your encoder supports SCTE-35 splice insert commands.
- Configure splice cues with the desired break duration.
- Test cue timing on a staging stream before going live.
Manual ad insertion from the Control Room
Use manual ad insertion when ad timing cannot be predetermined — for example, sports events with variable break lengths.
- In the Control Room, locate the Insert Ad control. (It is available while the channel is running.)
- Choose the Ad Break Duration (e.g., 30, 60, 90 seconds).
- Click Insert Ad to fire the SCTE-35 cue.
- Monitor the Control Room preview to verify the break.
SSAI best practices
- Test the ad tag against a staging stream before a live event. Verify the ad server returns creatives and that quartile beacons fire.
- Match fill slate resolution to your live output. A 1080p slate against a 720p stream will scale poorly.
- Decide ad-config selection per surface. If multiple teams will distribute the same channel under different ad configs, regenerate Channel URLs and Embed on Web independently — tokens issued from one surface do not affect the other.
- Treat the embed code as immutable. Once distributed, viewers will keep using whichever ad config was bound at generation time until you ship a new embed.
Troubleshooting SSAI
- Ads are not displaying
-
- Confirm SSAI was enabled when the channel was created (Channel Settings → Advanced Settings → SSAI).
- Check the ad configuration on the viewer’s token: regenerate the Channel URL or Embed on Web with the expected ad config selected and retry.
- Verify the ad server URL responds with valid VAST/VMAP/DFP for the chosen response type.
- Review SCTE-35 cue timing and break duration.
- Fill slates appear instead of ads
-
- Confirm the ad server has inventory available for the requested time slot.
- Check ad request latency — slow ad servers cause fallback to slate.
- Test the ad server URL independently (e.g., paste into a browser) to confirm a creative response.
- The ad configuration dropdown is empty
-
- Verify at least one ad configuration exists under Admin → NextGen Live Settings.
- Confirm SSAI is enabled on the channel. The dropdown only appears for SSAI-enabled channels.